How to Draw a Barn Door in Plan
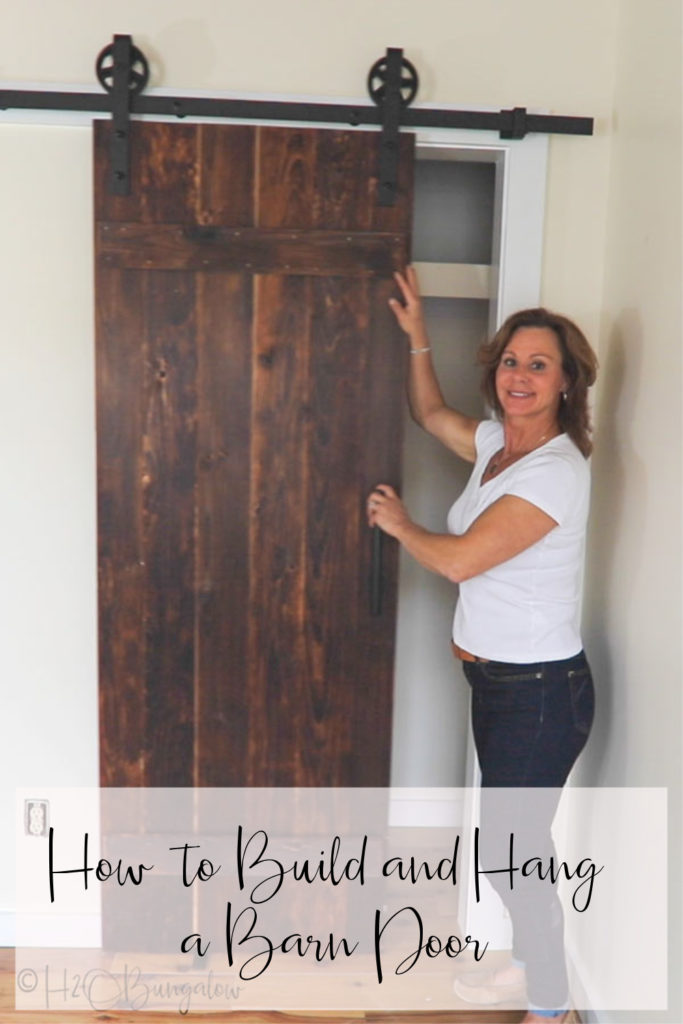
Today I have a beginners guide to building a barn door with free plans and a video tutorial. Building a befouled door is not hard if you accept some bones woodworking skills and good directions. I've broken everything downwards into easy to follow steps on how to build a barn door and how to install a befouled door by yourself besides. Friends, if I can do this, so can you lot!
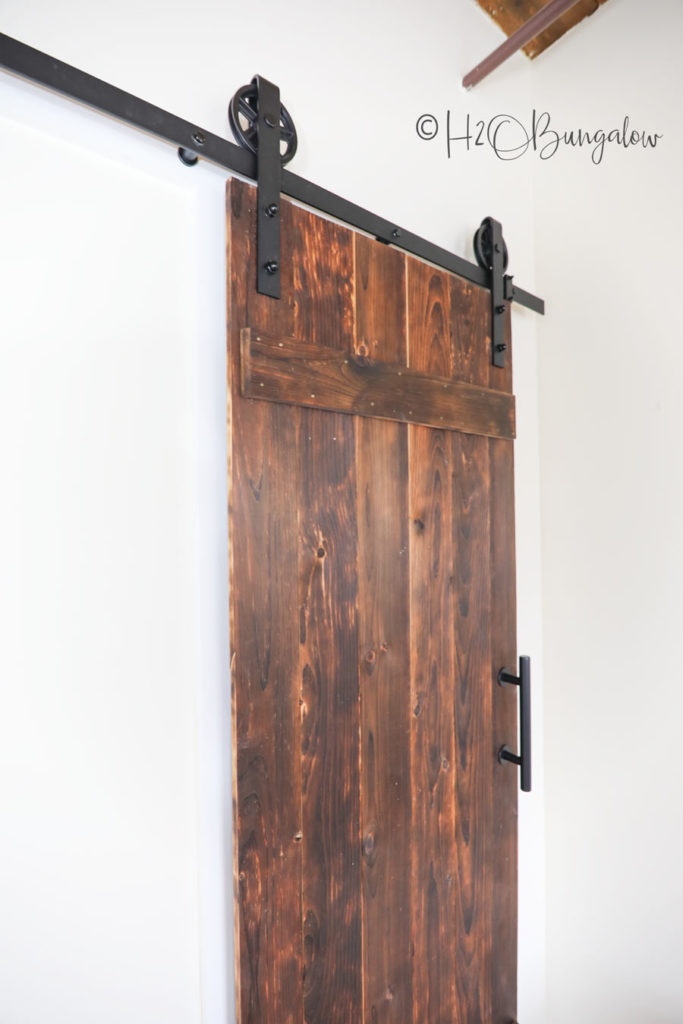
I finally finished these 2 torched wood closet barn doors for the new Factory Identify in VT. It's no hugger-mugger I love sliding barn doors for manner and usefulness. You guys have seen the DIY Double Barn Door I made for the North Business firm Society bathroom and the mod horizontal wood sliding barn door for the sleeping room adjacent door to that one which you can meet in the #54 house tour. Eventually, I'll go around to writing the tutorial for it.
Also exist sure to check out my hollow cadre door makeover and my shaker cabinet door DIY!
Tutorial for Edifice a Befouled Door
Supplies used to build a simple befouled door.
- half-dozen – 1″ x 6″ pine tongue and groove boards @ 8 feet
- i – 1″ x 6″ or 1″ x 4″ pine lath @ 10 anxiety
- #eight – 1 one/4″ finishing screws
- Barn door hardware – This is what I used, it'due south a neat bargain and included everything
- wood glue
Tools needed for this project. You can rent the larger tools for a day to brand these doors
- Miter saw
- Table saw or circular saw
- Kreg Multi Mark Tool – very handy
- 3-iv′ level
- Drill with 1/8″ drill flake
- Measuring tape – my favorite for wood working
- Bar clamps, 2
- Socket set for the rails bolts
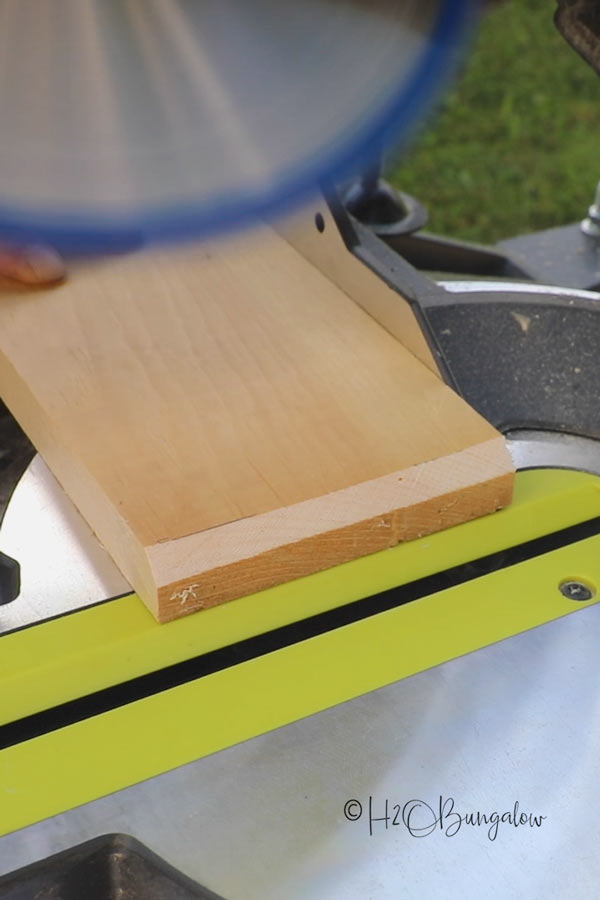
Step ane. Cutting the wood to size.
I built these sliding bar doors for closets in two bedrooms. My doors are 29″ x 81″ and my door opening is 26″ x 80″.
If your doorway is wider brand adjustments in how much y'all cut off the two exterior boards. If your door is taller, less off of the terminate of each lath.
Cutting listing for a 29″ broad x 81″ tall door
- four – i″ x six″ natural language and groove boards cut to 81″ long (slats)
- 2 – 1″ 10 vi″ tongue and grove boards ripped to 3 ane/2 " wide and cutting to 81 long (exterior slats)
- 2 – ane″ x six″ or 1″ 10 iv″ boards @ 28″ long (rails)
Optional: both runway (cantankerous supports) were chamfered at each cease which is a dainty finishing touch. An easy way to chamfer an stop is to make a marking 1/iv″ in from the edge of a square cut and trim that chip off with your miter saw set to 45°. Y'all'll see this step in the video.
Tip: Choose good quality lumber when edifice a sliding barn door. When you're picking out your lumber, make certain information technology's not bowed, warped or damaged. Hold i cease up to your eye with the other stop resting on the floor, look downwardly the board to check that it's directly. Next, you'll cheque for splits in the wood and large knots that may be in the way. This article on How to Choose Lumber for Woodworking is a good resources.
Step 2. Torch or stain wood now.
You'll see I torched the forest on my door for the finish. If you're going to torch and scrape the forest for your DIY sliding barn door, you'll practice information technology now. You'll meet how I did this in the video. If y'all programme on staining your barn doors, y'all'll as well want to practise this before assembling them so when they shrink slightly, the unstained wood won't show through at the seams.
If you're painting your DIY door, skip this stride and paint it after it'south assembled only before y'all add together the hardware.
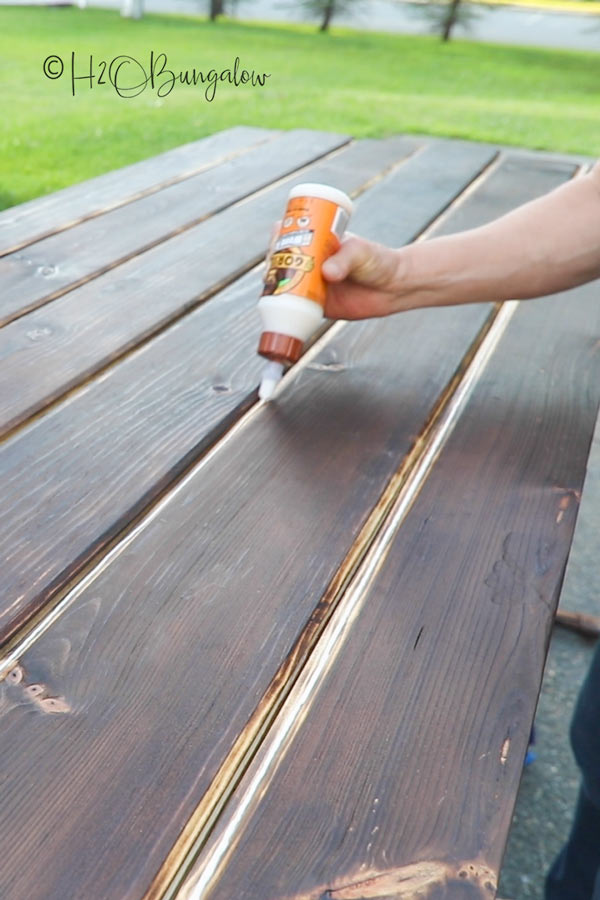
Step iii. Gum and clench door slats together.
Lay the long boards together and mark 9″ downward from the top and lesser, which is where you lot'll attach the back up track.
Run a dewdrop of forest glue downward the natural language on each board. Slide the lengths together and secure with a bar clench at each end.
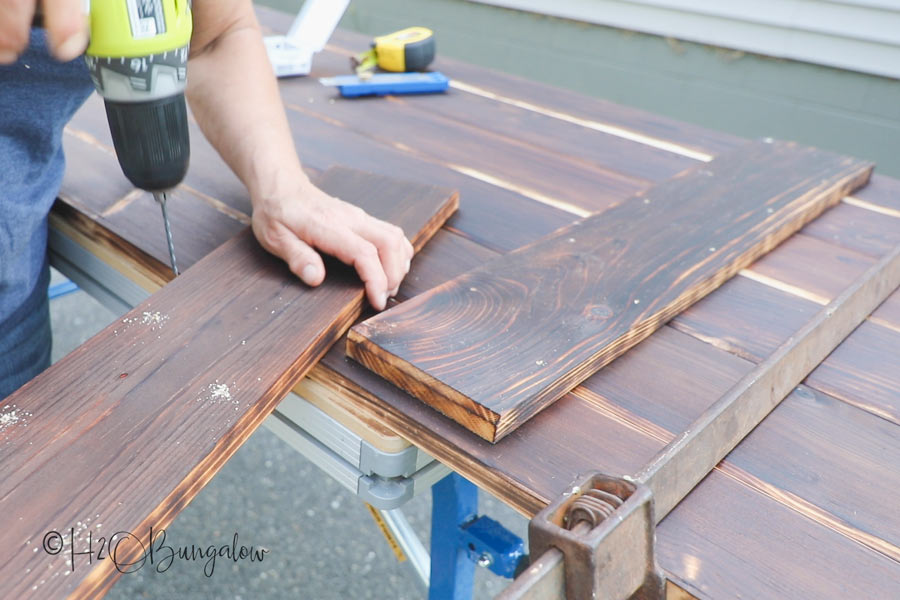
Step 4. Attach cross support confined onto the door.
Predrill airplane pilot holes with an 1/8″ drill bit making ii airplane pilot holes per door slat along the support bar. Position the two 28″ cross supports and then they are evenly spaced from each side. Using a Kreg Multi Mark Tool will relieve yous a lot of time. You see me using mine in the video for a lot of repetitious measuring.
Attach with 1 1/4″ finishing screws on the inside of the line you lot marked earlier.
Notation: the cross support bars tin can be screwed on from the forepart or the back of the door. The screws won't testify if you attach them from the back. Mine are attached in the front end which made it easier to line upwardly the cross support.
Remove the bar clamps. Your DIY sliding befouled door is set up for hardware and hanging!
Step 4. How to install the barn door track perfectly level.
I not only congenital these barn doors myself, I hung them as well. It's not that hard, follow the steps below and have your time to go the runway straight. Everything else will fall into identify.
Install the metal track that your barn door rollers will residual on before adding the barn door hardware to the door. This will allow yous to double cheque yous accept enough clearance for the sliding hardware at the top of your door.
-
- Mark a straight line using a level where the sliding barn door rail will attach to the header. I marked mine in the center of my 4″ header.
- Marking and drill the outset and last pilot hole positions past holding the metal rail then the line is centered in the screw holes on the metallic rail.
- Side by side, drive a 2-3" screw into the outset pilot hole marking and hang the rail on that screw.
- Attach the other end of the runway to the wall with the included commodities. Don't tighten information technology all of the way.
- Recheck the rail is straight. Place a level on top of the rail, line up the first airplane pilot hole, making adjusts to that pilot hole position if needed.
- At present, attach the rail at that terminate. Leave the bolts on the rail loose.
- Now that the two ends are attached, attach the center bolts. Like earlier, use pilot holes.
- Last step is to tighten all of the bolts.
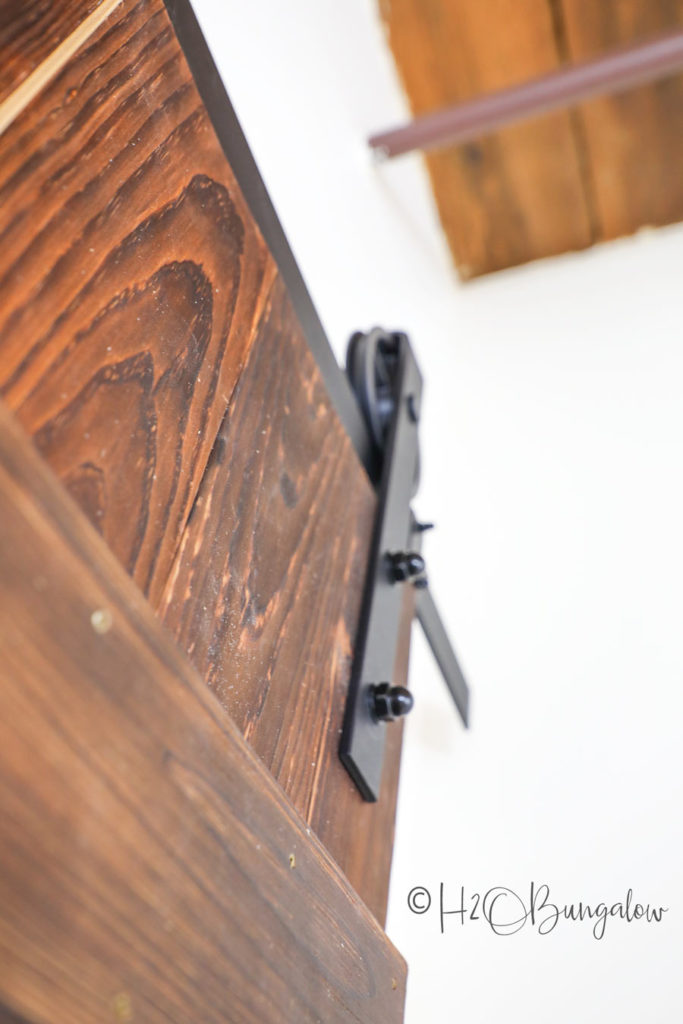
Step 5. Attach hardware onto the DIY befouled door.
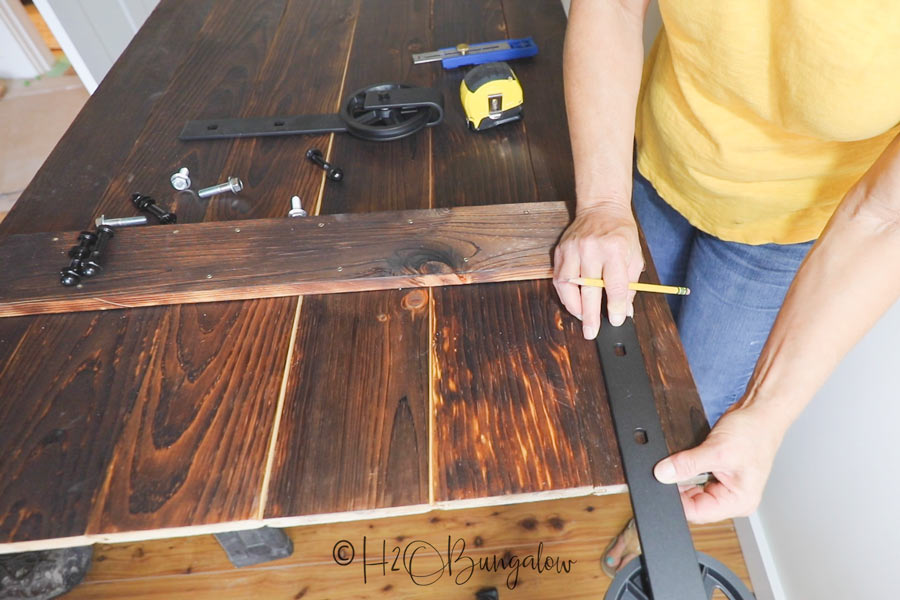
Check the door position on the roller hardware past placing the rollers on the rail and mark where the door should adhere to the roller strap. Your door should hang at to the lowest degree 1/2″-1″ off of the floor.
I marked six inches downwards and two inches over at the top of my barn door to fit my roller hanger. Since the door roller bolts are large, information technology'south easier and y'all'll accept more command over accuracy by drilling small pilot holes commencement, followed by a large one to fit the door hardware bolt.
Tip: Cheque the length of the bolts that come with your barn door roller hardware. The shorter bolts for 3/4″ fabric were missing from my box and so I had to buy some at the local hardware store. Since the door uses blackness decorative crown caps, yous can't run across that I didn't use blackness bolts.
Last, adhere the handle per the instructions. Again, I used my Kreg Multi-Mark Tool to marking the placement. Employ a small pilot hole drill bit kickoff and and then move to the larger drill bit.
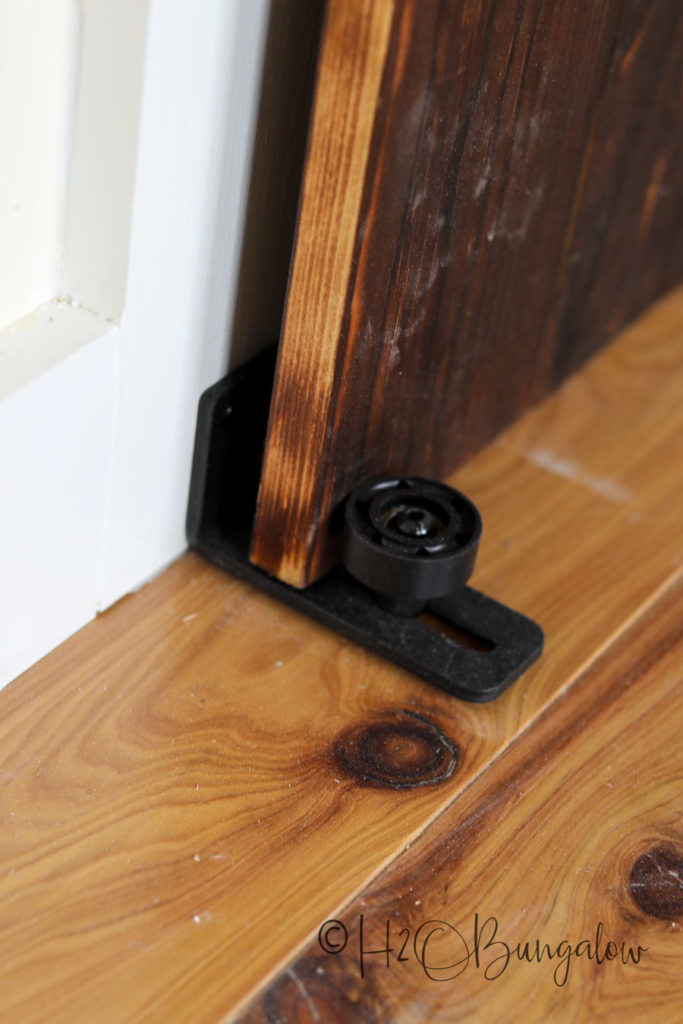
Pace half dozen. Install the floor guide
The floor guide keeps barn door from swinging out and potentially jumping off of the track. After installing 4 barn doors here in VT, I like the kind that attaches to the wall all-time. Plus, information technology doesn't drill into the floor which I similar besides.
Put the door on the track. Position the floor guide on the wall so the door stays within the roller when fully opened or closed. Marking and drill airplane pilot holes and adhere to the wall. Mine fit on the door trim, yours may fit on a baseboard depending on the size of your DIY barn door.
Step 7. Add together the bumper guides on the track.
The last footstep is installing the bumper guides onto the top rail. Bumper guides keep the barn doors from sliding off the end of the top rail when the door is open. In my case, the bumper stop also stops the sliding barn door from striking the wall.
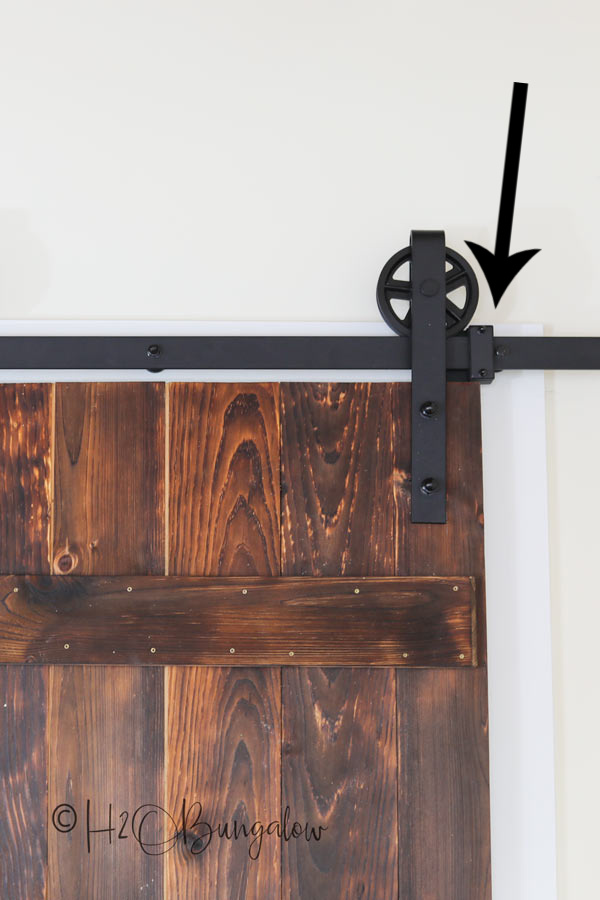
Install the bumper guide by loosing upward the bolts that hold it together, slide information technology onto the rail and tighten.
Position the door barn door stops or bumper guides so the door opens enough to expose the full doorway when open and so the door is centered in the frame when shut.
FAQs nearly building a barn door
Make up one's mind on the door size. measure door opening width and superlative.
Befouled doors should at minimum, cover the door opening and extend a few inches past the door when fully open. The barn door will hang a ane/two to 1″ off the floor and extend higher up the pinnacle of the door opening.
Decide if you lot'll use a header or the studs in the wall to anchor the barn door rail.
If y'all're installing a barn door on an existing framed door, you have a few choices for installing a befouled door rails.
- Install a header above the electric current door trim.
- Ballast the metal befouled door runway directly into the studs on the wall. The studs and rails holes don't e'er line up well.
- Take off the existing door trim and re-trim the door building the header into the trim. This is what we did on these closet sliding barn doors and the double sliding barn door I built for the bath.
A header for the door could be equally simple as a 1″ x iv″ board attached with 3 1/2″ screws into the studs in the wall. The do good of using a header for your DIY barn door is you won't be limited or challenged by the stud spacing in your wall equally you align the metallic barn door rail for the door.
Purchase your barn door hardware
You'll want to make sure the rails is twice as broad as the door opening. It's best if you lot purchase your barn door hardware before your doors are congenital. The hardware kit I ordered included two types of floor guides and the door handle which was a good bargain. I've had to buy these items separately in my 2 by sliding barn door projects and they were expensive.
Volition you end your door earlier or subsequently building it?
If you are planning to paint your barn door, information technology's Ok to paint after information technology's been assembled. When staining or torching the wood information technology's best to practise that outset before building a barn door.

Why before, you ask?
Tongue and groove pine, most wood, will shrink a bit afterwards it'south assembled. If you lot're going for a rustic barn door wait similar mine, you're fine. In other words, unfinished wood seams will be slightly exposed over time.
Like I mentioned earlier, if I can build and install a barn door myself, so tin can you! Fifty-fifty if y'all're edifice a barn door that has a unlike mode you can follow my tips on hanging a barn door. I establish this swell resources on unlike sliding barn door styles that may also inspire y'all!
All-time of all, these doors look great and only cost about $100 each to make and that includes the hardware!
Don't forget to salve and pin my DIY befouled door projection and share information technology on Facebook!
Now that I've shared the steps to building a barn door, are you ready to tackle this DIY project yourself?

Instructions
- 4 - ane" x six" tongue and groove boards cutting to 81" long (slats)
2 - 1" x 6" natural language and grove boards ripped to 3 1/two " wide and cutting to 81 long (outside slats)
2 - 1" x 6" or i" 10 4" boards @ 28" long (runway) - Torch or stain the wood prior to assembling.
- Lay the long boards together and mark 9" downward from the top and bottom, which is where y'all'll attach the support runway.
- Run a bead of wood glue down the tongue on each board. Slide the lengths together and secure with a bar clamp at each end.
- Predrill airplane pilot holes with an i/8" drill bit making two airplane pilot holes per door slat along the support bar. Position the two 28" cross supports so they are evenly spaced from each side. Using a Kreg Multi Marking Tool will salvage yous a lot of time.
- Attach with one 1/4" finishing screws on the inside of the line you marked earlier.
- Remove the bar clamps. Your DIY sliding barn door is ready for hardware and hanging!
- Install the metal rail that your barn door rollers will remainder on before adding the befouled door hardware to the door. This volition allow you lot to double check y'all have enough clearance for the sliding hardware at the elevation of your door.
- Marking a straight line using a level where the sliding barn door rail will attach to the header. I marked mine in the center of my 4" header.
- Marking and drill the start and last airplane pilot hole positions by belongings the metallic rails so the line is centered in the screw holes on the metal runway.
- Adjacent, drive a two-iii" screw into the first airplane pilot pigsty mark and hang the rails on that spiral.
- Attach the other end of the runway to the wall with the included bolt. Don't tighten it all of the way.
- Recheck the rail is straight. Place a level on height of the rail, line up the first pilot hole, making adjusts to that pilot hole position if needed.
- Now, adhere the rail at that end. Leave the bolts on the rail loose.
- Now that the two ends are attached, attach the middle bolts. Like earlier, use pilot holes.
- Terminal step is to tighten all of the bolts.
- Check the door position on the roller hardware past placing the rollers on the rail and marking where the door should attach to the roller strap. Your door should hang at least one/two"-i" off of the floor.
- I marked six inches down and two inches over at the top of my barn door to fit my roller hanger. Since the door roller bolts are large, it's easier and y'all'll have more command over accuracy by drilling small pilot holes first, followed by a large ane to fit the door hardware bolt.
- Last, attach the handle per the instructions.
- Install the floor guide.
- Add the bumper guides on the track.
- Hang your door and you're washed!
Employ the following cutting list:
pressleyanots1962.blogspot.com
Source: https://h2obungalow.com/building-a-barn-door-beginners-guide-with-free-plans/
0 Response to "How to Draw a Barn Door in Plan"
Post a Comment